
In my last post on types of gemstone settings, I wrote about invisible settings. Jewellery made using this setting looks gorgeous with a sea of colour undisturbed by visible metal. This look can be easily achieved through DIY methods as well, especially using epoxy clay. If you want to learn how to make red rhinestone earrings and rings, follow along this tutorial.

Red rhinestone earrings and ring tutorial
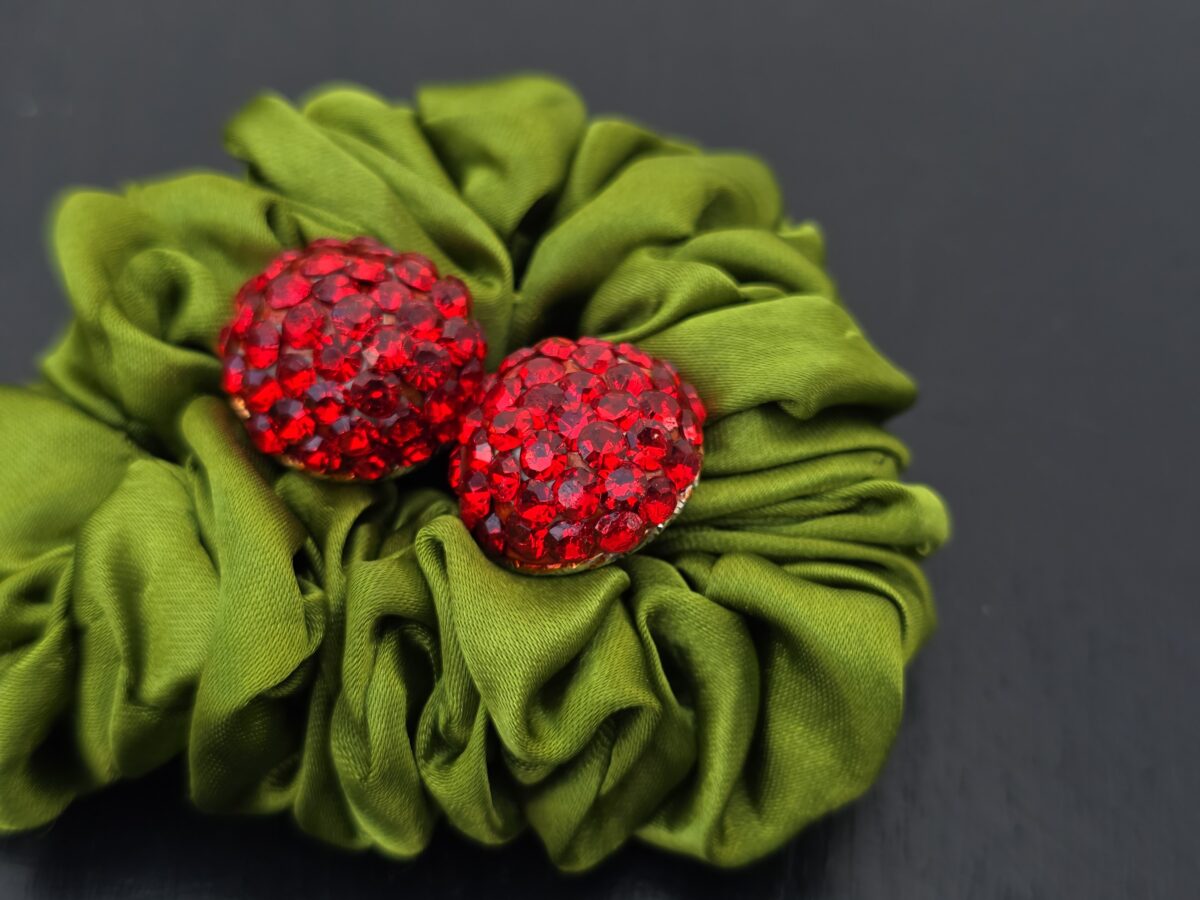
The designs of these Glittering rhinestone earrings and ring are inspired by the fabulous Plumptious candies of Tamannaah Fine jewellery, by Indian actor Ms. Tamannaah.
Materials
- Epoxy Clay
- Faceted rhinestones
- Stud posts and stopper (for earrings) – 1 pair
- circle connector(for earrings) – 1 pair
- Ring base (for the finger ring) – 1
- Water resistant ink or acrylic marker in the same colour as your rhinestone
- White glue

Make the glittering rhinestone earrings
- Mix equal amounts of the resin and hardener of the epoxy clay. Knead until there are no strokes and that it is a smooth, pliable mixture,
- Pinch two equal blobs of the epoxy clay and roll them into half inch balls. Flatten them on one side so that you can glue the stud post. Flattening them will make them wider. Alternatively, you can use a frame or a circular connector (depending on the size of earrings that you want) as a base for the stud.
- Glue the stud post and cover with a thin layer of clay. Press it in to seal the base.
- Press the faceted rhinestones in the clay before it dries. You should have about 30-45 minutes depending on the brand. Cover the entire surface as much as possible.
- Let both the front and back dry for 12-24 hours.
- Colour any gap areas peeking out using matching colour waterproof ink
- Clean up any unwanted colour streaks using an alcohol swab. Hand sanitizer would work in a pinch.

Make the glittering rhinestone ring
- Mix equal amounts of the resin and hardener of the epoxy clay. Knead until there are no strokes and that it is a smooth, pliable mixture,
- Pinch one blob of epoxy clay, roll and press to the ring base. Use a thin layer of white glue on the base for better adhesion.
- Press the faceted rhinestones in the clay before it dries, covering the entire surface as much as possible. Use a toothpick if needed to press the stones in.
- After a day, colour any gap areas peeking out using matching colour waterproof ink.
Method Variations
You can use any permanent writing ink instead of the waterproof ink that I used. You can also use acrylic paints but the clean-up will be a lengthy process.
Instead of making a solid epoxy clay hemisphere, you can use a small stryrofoam ball or a ball of scrunched up tissue paper as filling and cover up with clay. This will result in lighter components. However, the clay must be thick enough to hold the faceted ends of the stones. If you want more of the clay to be seen, you can leave gaps as I did with epoxy clay moon ring.
Making these pieces takes time but they are quite hardy and withstand rough use. I dropped one of the earrings (just after photographing then) and it fell two flights of stairs and bounced several times before landing. Only 3-4 stones fell and could be replaced easily. I have worn the set a couple of times afterward. So take your time and have fun making and wearing them.
I hope you find it interesting
Cheers

What do you think?