
Three years ago, I commissioned a small strip of fabric with Toda embroidery with a plan to turn it into a side focal for a necklace or into a bracelet. Not finding the appropriate beads for it, I put it aside. Every once in a while, I would pick it up and wonder what I could make and like time passed. Last week, I forced myself to turn it into something, anything, to break out of my “I do not know how to make jewellery anymore” phase. It was difficult but I ended up making earrings and here is the resultant Toda earrings Tutorial for you.
A photograph of the piece of fabric being embroidered was used in Handpicked collection of picture jewellery featured at NYCJW 22.
What is Toda Embroidery
Practiced by the Toda tribal community from the Nilgris region of Tamil Nadu, Toda embroidery or Pukhoor is a representation of local flora on fabric. The hand embroidery is traditionally done by women on the Puthukuly shawl, and is worn as a cloak by both men and women of the region. Only black and red thread is used on a white based. While the fabric is made up of cotton, it provides warmth like wool. Further, the embroidery technique is such that the resultant design looks woven and not embroidered.

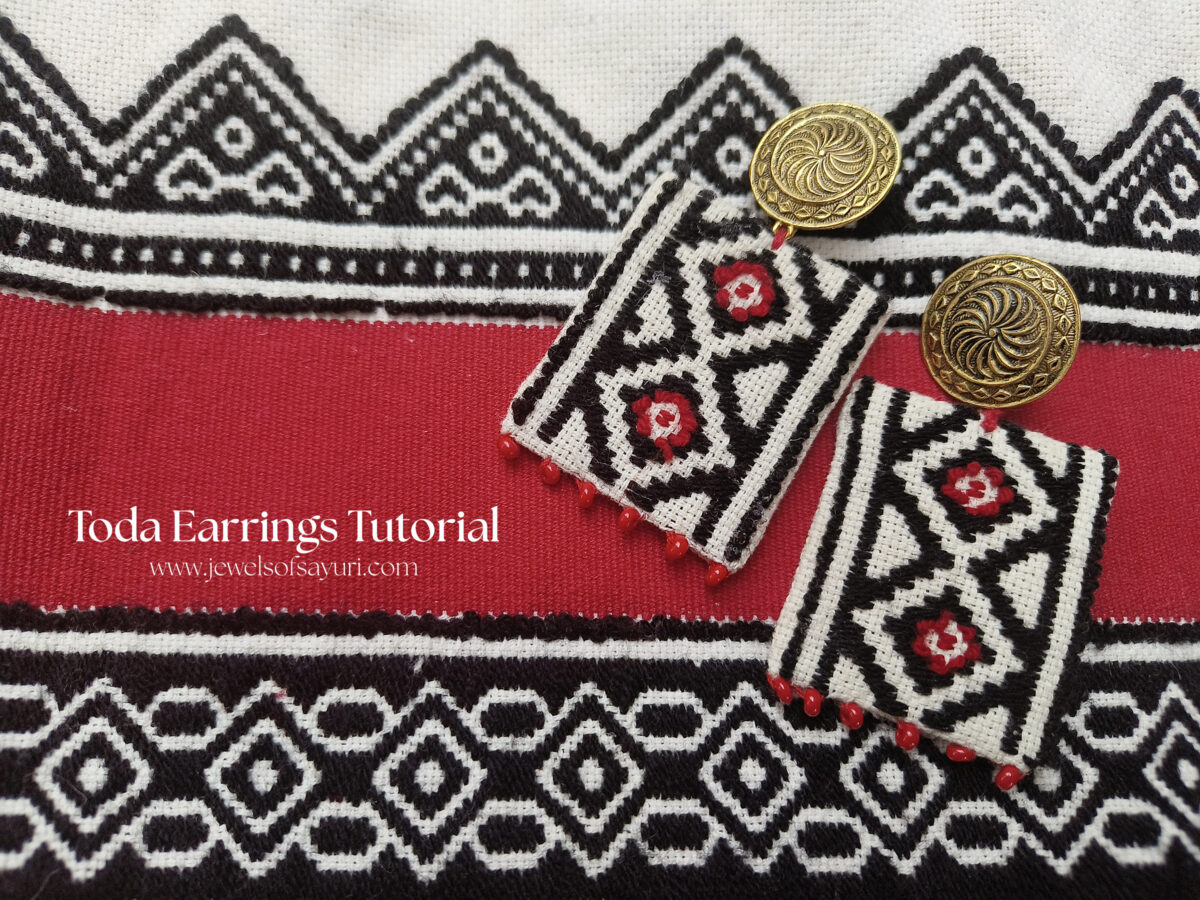
Toda earrings Tutorial
Before I begin, here is a disclaimer. The earrings that I am showing in this post have nothing to do with the gold or silver earrings worn by the Toda women. Further, this tutorial is also not about the process of embroidery. I have used the name only to give credit to the community and their craft.
Materials
- Embroidered fabric – I got the embroidery (5 inches by 1.6-1.7 inches) done as a continuous strip on a fabric base that was approximately 6″ by 4 “. For each earrings I used a length of 2 inches of embroidery with extra fabric as allowance to fold
- Glue – I used silicon glue for it was handy and it worked well. Alternatively, I would suggest fabric glue.
- A piece of white cardboard cut into 2 rectangles. I reused a box that I got from an online order
- A pair of studs – I used large round studs in gold tone to balance the bulky shape of the embroidered component
- Red embroidery thread, red sewing thread and needle
- Red seed beads (must be 10/O or 9/O)
- White felt for the backing

Method
- Cut the cardboard into 2 rectangles as per the size of the embroidery.
- Cut the fabric accordingly and leave enough allowance.
- Glue the fabric to the cardboard – apply glue only on the back and stick the excess. Press and let dry for a clean finish.
- Cut white felt into the required size and glue it on the back. Let the components dry fully for a few hours.

- Sew the stud to the component. Run the thread a couple of times, knot and then glue it down. Alternatively, poke a hole and connect the component and the stud using jump rings.
- Thread a sewing needle with red sewing needle and carefully sew six seed beads on each component on the bottom ridge. The stitches must not be visible both from the front and the back. Once you knot the thread, push it into the ridge and apply a bit of glue. The earrings are now ready to be worn.

While I have used Toda embroidery for my earrings, you can use any embroidered fabric for this design. You can edge the component with more beads or skip the step completely. The earrings are quite big but easy to wear, as they are light weight.
I hope that you enjoyed this tutorial and found it useful. If you like making fabric jewellery do look up my previous tutorials on Chrysanthemum brooch, Fabric jhumka earrings, and Jute earrings earrings.
I hope you find it interesting
Cheers

What do you think?