
During a recent industry attachment programme with the Chennai Photo Biennale foundation, Chennai, I was introduced to Cyanotype. Cyanotype printing is an analogue photographic printing process that produces a distinctive blue colour. The process was developed in the 19th century by Sir John Herschel. The process combines iron salts to create a UV light-sensitive solution that produces intense shades of cyan blue when coated on papers or other porous surfaces and exposed to sunlight/UV light. Cyanotype prints can be created on both paper as well as fabric. Those created on paper can be set in resin to create beautiful Cyanotype jewellery. I created two sets of jewellery-related explorations using the technique.

Materials needed to create cyanotype prints on Paper
- Ammonium Ferric Citrate solution
- Potassium Ferricyanide solution
- Beaker to mix the solution
- Pipettes to draw the solution/to dot the paper
- Foam brushes to spread the solution
- Acid free watercolour paper
- Objects for impression or negatives
- Distilled Water
- Tap water and trays to wash the prints in
- Hydrogen peroxide solution
If you are in India, you can buy a Cyanotype kit from the Chennai Photo Biennale foundation’s online store.

Mixing the Cyanotype solution
Cyanotype solution is a mix of two chemicals, ammonium iron(III) citrate solution and potassium ferricyanide solution, mixed together in equal parts. 10gm of Potassium Ferricyanide should be mixed with 90gm of distilled water to make a 100ml solution, whereas 25g of Ferric Ammonium Citrate should be mixed with 90gm of distilled water to make a 100ml solution of the same. Only a few drops of each solution is required to create an A4 size print and therefore, the bottle goes a long way. Use only dark bottles to mix the powder into solution form and store them away from light. Once you mix equal amounts of both solutions together to create the cyanotype mixture, use it within a day or two.

Method – Cyanotype print making tutorial
- Prepare the solution as specified above
- Coat the paper: Once the solution is ready, it is applied to paper or fabric. Using a brush or foam roller, spread the solution evenly over the surface of the paper or fabric.
- Dry the paper: Once the paper is coated, it needs to dry completely in the absence of UV light. You can speed up the drying process by using a hair dryer in a low heat setting.
- Prepare the negative: To create the image you want to print, you will need to create a negative. You can do this by printing a digital image onto a transparency sheet. You can also use botanicals like dried leaves, flowers or even 2D/3D objects as negative that will block the UV light.
- Place the negative/object on top of the dry, coated paper. You can use a sheet of glass to keep the negative/object in place. The areas of the paper that are not covered by the objects will be exposed to sunlight and turn blue.
- Expose to sunlight: The coated paper and negative should be placed in direct sunlight or UV light for a specific amount of time. This exposure time can vary depending on the strength of the light and the object used as the negative.
- Rinse: After the exposure time has elapsed, rinse the paper or fabric under running water for several minutes. The water will wash away any unexposed cyanotype solution, leaving behind a blue and white print. Dip it in Hydrogen peroxide solution for 2-3 seconds to get a darker blue colour. Dry the print.
With these steps, you can create beautiful cyanotype prints perfect for framing or incorporating into other artistic projects.

Cyanotype in jewellery
Cyanotype Jewellery is resin jewellery created using the 19th century analogue printmaking technique of Cyanotype and resin. You can use both UV resin and epoxy resin to create jewellery. Since I had access to a UV light box during the cyanotype workshop, I tried making UV resin jewellery with the bezels shown above. However, it was a complete flop. The UV lights installed in the nearly A2 sized box was too much for my tiny bezels. Out of the 11 bezels only 3 turned out half decent. The rest were either foggy or had cracked or had bubbles. UV resin is quick to use but has its own cons. Read about the Pros and cons of UV resin here.
After scrapping the bezels and removing the set resin and the prints, I reused the bezels to make Cyanotype jewellery using epoxy resin and a fresh print using leftover chemicals.

Cyanotype Jewellery tutorial
- Cyanotype paper prints
- Metal bezels
- Cutters or Scissors
- Modpodge and a brush to apply it
- Epoxy resin kit (Resin, hardener, mixing cup and a spatula or toothpick)
- Coordinating Beads and findings (ear hooks, clasps, jumprings)
- Jewellery making tools
Cut the print to fit into your bezels. Seal with 2 coats of modpodge and let them dry overnight. Mix resin and hardener as per manufacturer’s instructions and pour into the bezels. Let it cure for 72 hours before making jewellery. I made 3 pendants and three components. This was the first time I tried a curve bottom bezel and it is not difficult as I imagined.


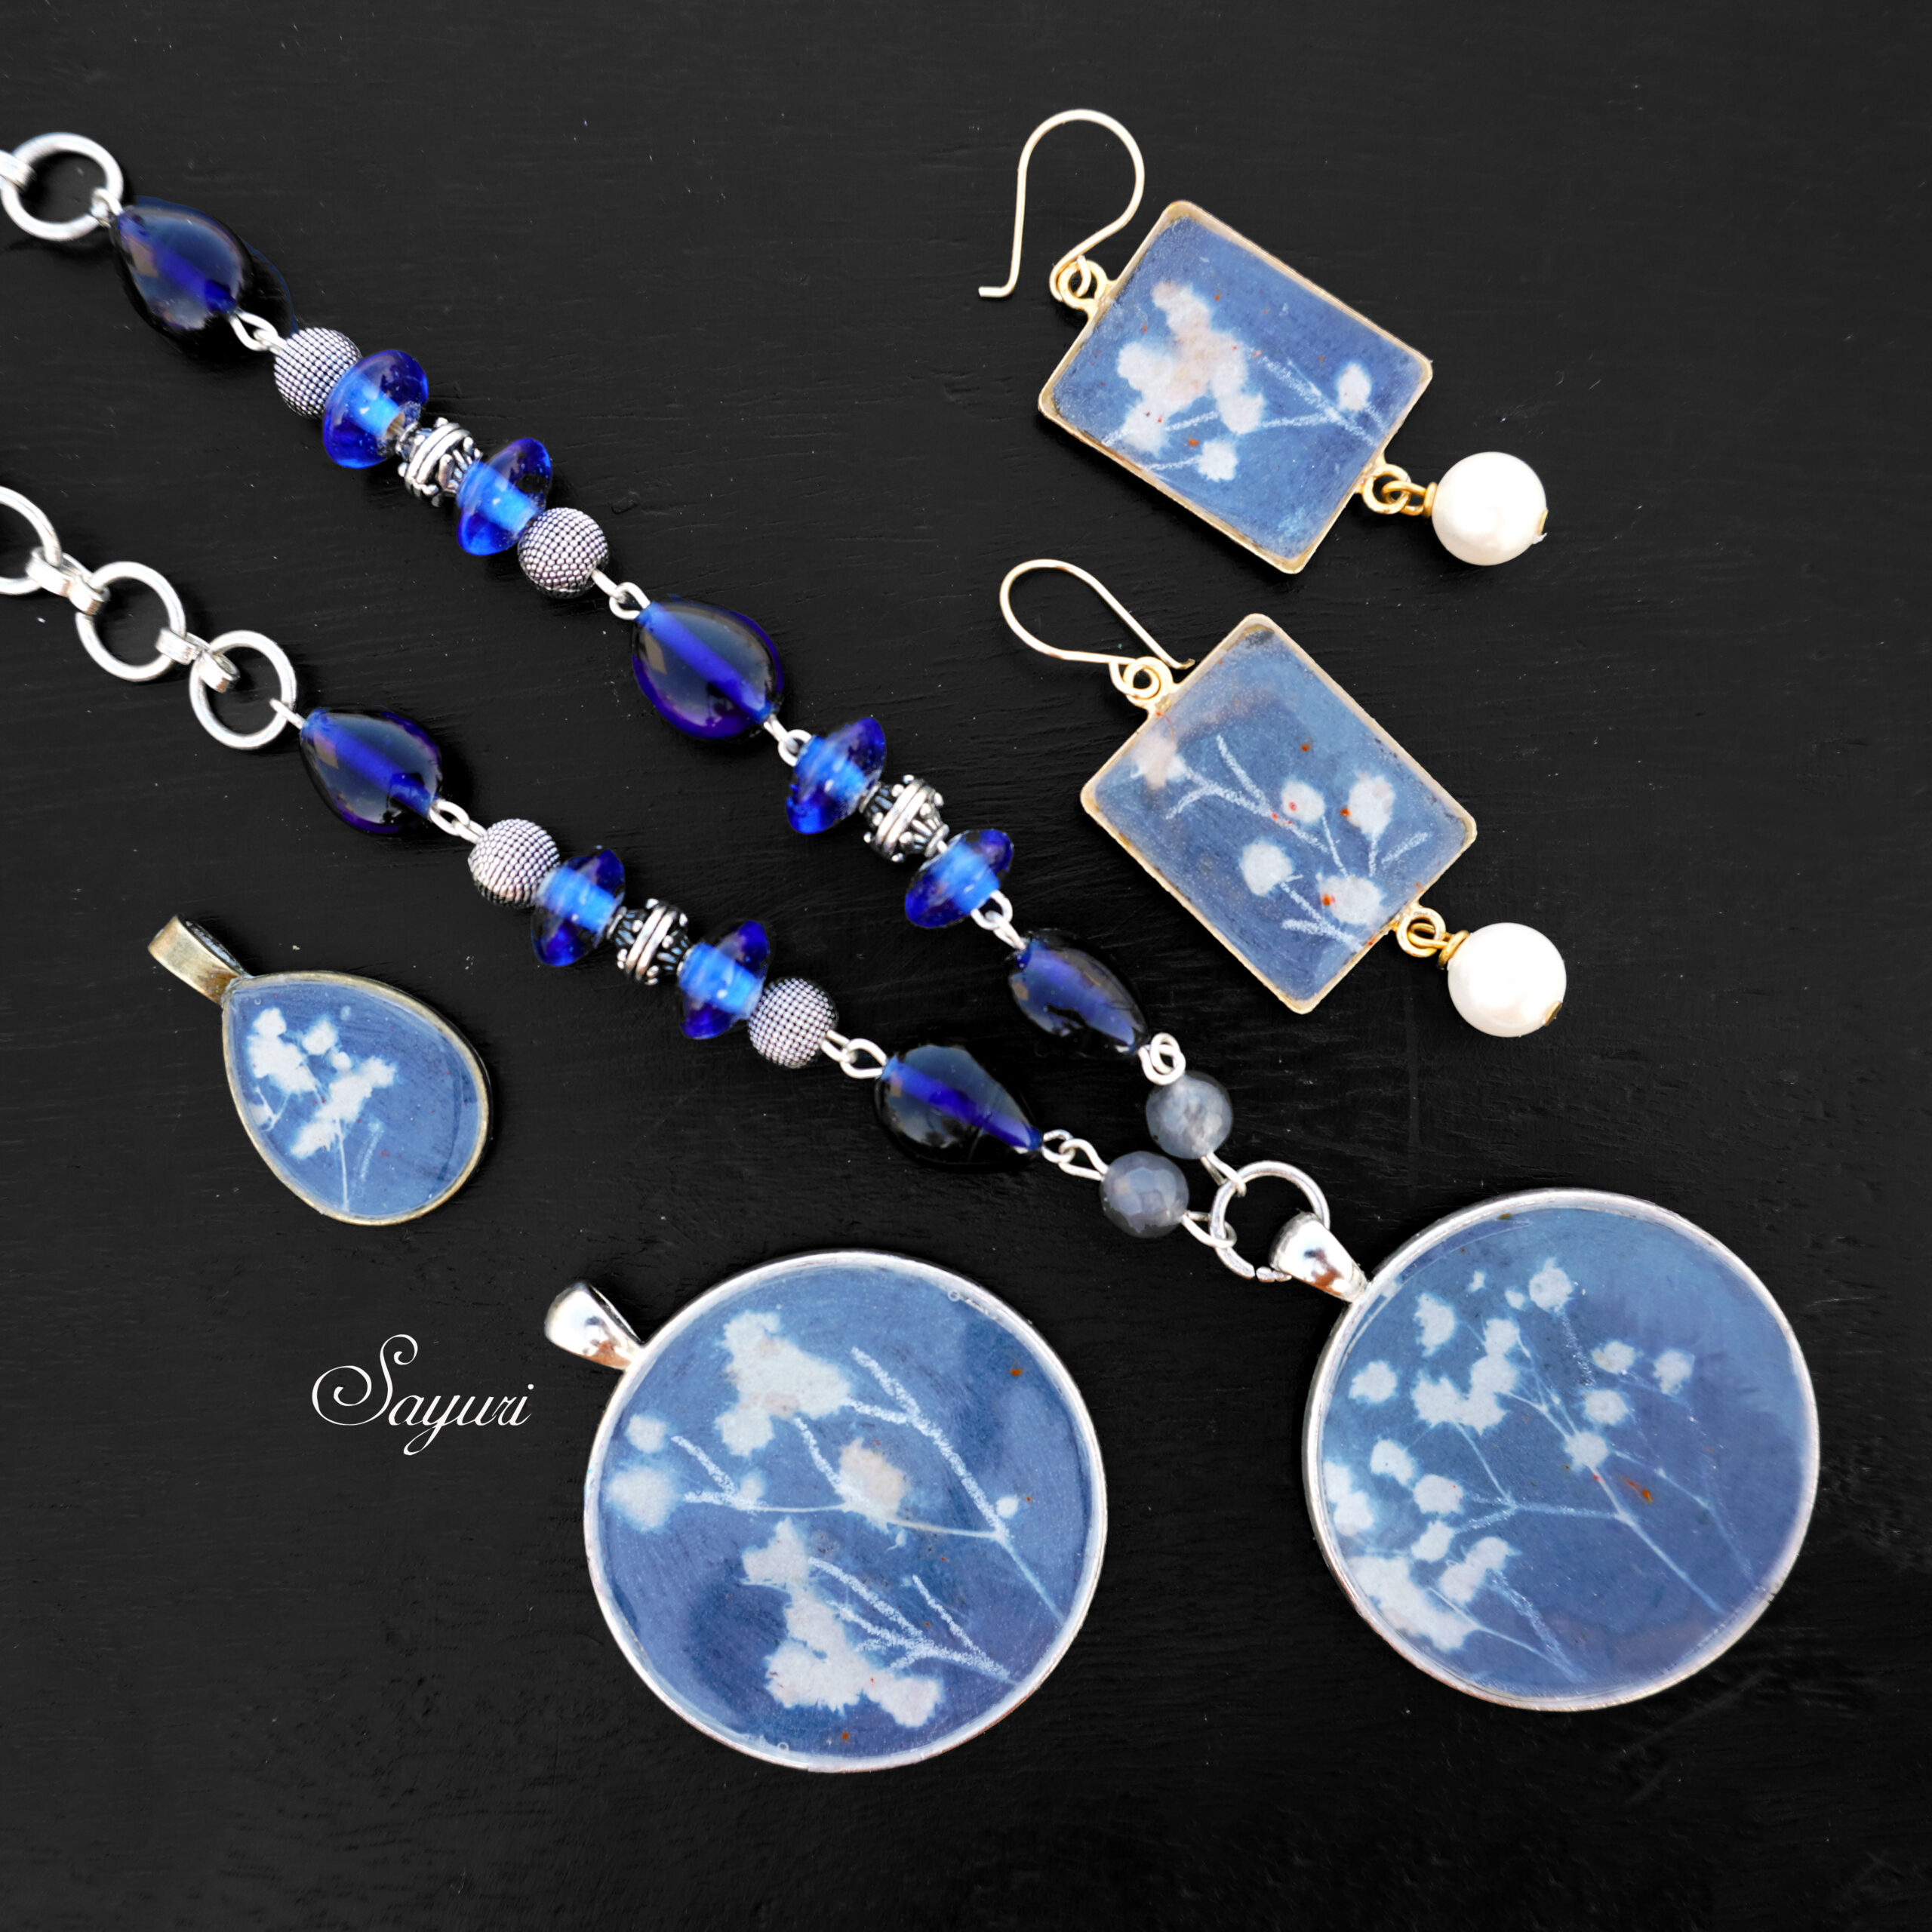
Cyanotype jewellery
I made two necklaces, one pair of earrings and a finger ring. I sold one necklace, kept the other and still have a pendant left.. Majority of the components turned out to be streaky even in the second attempt. I wonder if its the mod podge that is causing issues or the fact that I did not use acid-free water colour paper the second time. Further, the earrings have specks of red from another earring project that I was casting at the same time. Lesson learnt – cast coloured and clear resins at different workstations and do not use the same wet wipe to clean the workstations even 2-3 hours after you pour the resin. However, I wore the earrings and resin for a presentation at college and they were well liked. It is only when you zoom the components as show above you see the streaks.
If I get another opportunity, I will create prints on acid-free watercolor paper using freshly mixed chemicals. It would be specially for jewellery making. Combined with new mod podge and epoxy resin, it should bring out the expected result.
I hope you find it interesting
Cheers

What do you think?