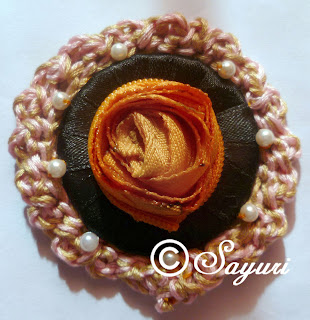
Continuing from Last week post on Crocheted treasures, Here is a brooch that even Crochet newbies can make easily. This one is a trick piece. Only the edging is crochet (I know, I am a lazy bum -I am not the one for intricate work) but I’ll tell you how I made it.

Materials:
– Embroidery floss ( 2 colours)
– Satin tape (1/2″ width to cover the stryrofoam base)
– Cardboard or styrofoam base
– Mystery object 1/2 of a 8″ concealed zipper
– 8 pearls
– Leather or suede for backing
– Glue
– Crochet hook, hand needle
1) I crocheted ( straight crochet) the edge with 2 embroidered threads of different colour, joined them to make a ring and added pearls (by stitching) as embellishment.
Here is how to crochet the straight lines – make 30 chains for the first line. Then do 2 ch up and then double crochet for all 30 .Join to make the ring
2) I cut a piece of Leather and stuck the crochet circle to it – good side facing the back.
3) I wrapped a piece of satin tape around the Styrofoam base(cut it to fit with the crochet circle) and secured it with glue
4) Remove the puller from a 8″ concealed zipper (the one used in skirts and dress). You can use a regular zipper too and separate the sides. Singe the edges to stop fraying. We will need only one side for this brooch.
5) Start rolling from one end, gluing/hand stitching as you go, until it looks as in the pic
6) you can use this as is or turn it around as I did for a softer look.
For more zipper jewelry ideas look for my post on zipper jewelry
7) Glue the satin round to the leather and finally the inverted zipper rose in between
8)Wait until dry and added a brooch pin to the back
Its done. Its an easy wear to wear crochet, even when you are Crochet newbie
This pattern offers a lot of scope for variation, so do try your hand at it. Hold on to it till Halloween and Glam up for in an elegant way
Hope you find this interesting
Cheers


Leave a Reply