
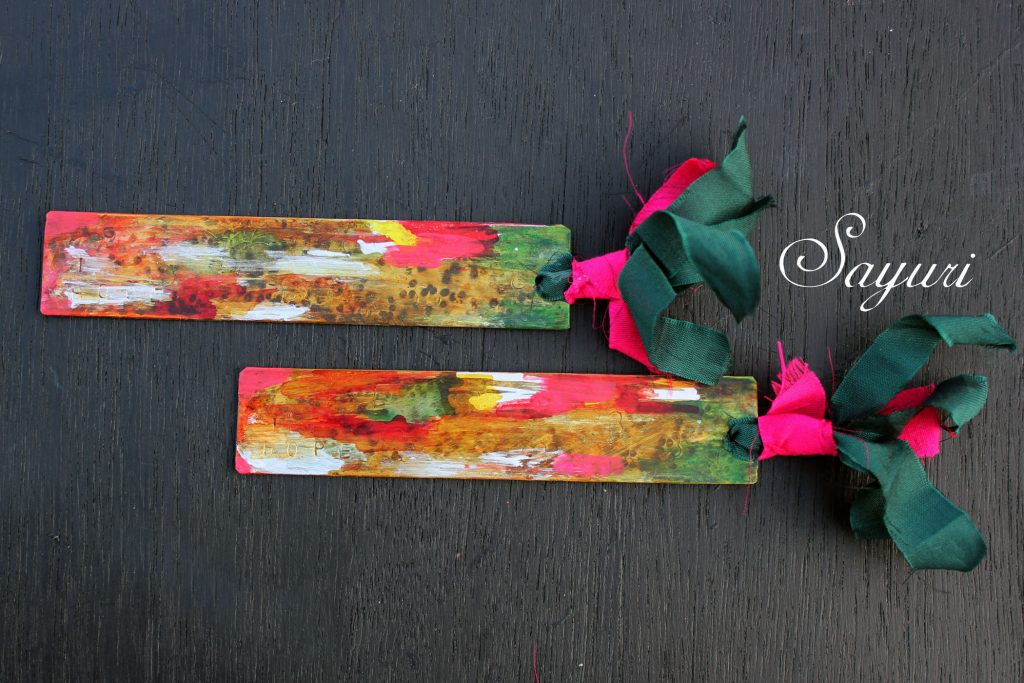
Hello everyone, I hope you would have enjoyed blog hopping last weekend for the BSBP reveal and are crazy inspired to try out new techniques. To aid you in your journey I would like to share the process of making the metal bookmark that I sent to both my BSBP and SwapNHop partners this year. The Metal Bookmark DIY tutorial is slightly different from my usual tutorials. It takes a couple of hours, some decent metalsmithing skills, and a bunch of basic tools. However, the techniques are quite simple with a lot of scope for improvisation.
I chanced upon this idea as I was teaching a metal jewelry lab class and found a piece of brass sheet. It had holes and scratches but it was strong and thick enough for a bookmark. I love reading and encourage everyone around me to read. I also love recycling and reusing. So I thought that a bookmark made out of recycled metal would be a great gift for my jeweller friends. I have also included my maker’s notes wherever required marked by the Superscript numbers and asterisks. Please scroll to the notes part of the tutorial to match them.
Level – Advanced jewelry making skills = Basic Metalsmithing skills
Time taken – Upwards of 2 hours for both bookmarks put together
Metal Bookmark DIY tutorial
Materials
- 20g or 22g brass sheet
- Jewellers saw
- Alcohol inks – Gold, silver
- Ice resin tint –Rose quartz, Raw ruby, yarrow,
- Vintaj Patina inks – Emerald green
- Sandpaper 400 grit or relief block
- Fabric bits ( Sari ribbon)
- Pickle (White vinegar+ salt)
- Brass Brush
- Liver of sulpur – Optional
- Sealant – Renaissance wax
- Soft cotton fabric
Tools
- Steel bench block
- Chasing hammer
- Dremel (drill bit and sanding attachments)
- Metal Alphabet stamps
Method
Prepare your bookmark block base
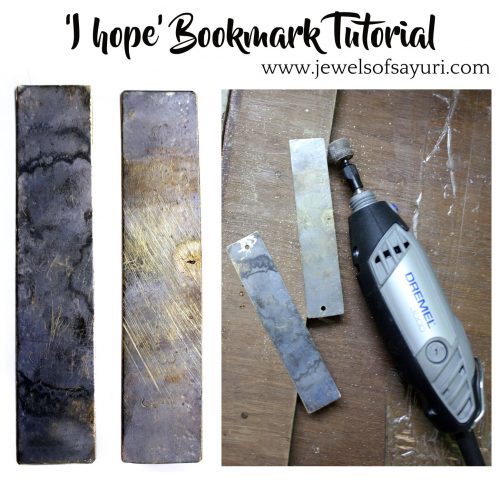
- Cut your metal to size (6″X 1″approx). ¹* I simply cut a piece of scrap brass I had, into two. I recommend using brass over copper as brass is more sturdy.
- Round the edges and file using a sander belt or a dremel. This is just the first quick sanding
- Anneal the metal to soften it ²*
- Tape you metal piece to a wooden block and drill a 2-3mm hole using your drill bit. Alternatively you can clamp it if you have a vise
- Sand the hole and all over the bookmark for a smooth finish, first using the dremel and then with 100, 240 sandpaper. Make sure that your piece passes the “blind test”³*
Add Texture & Stamping
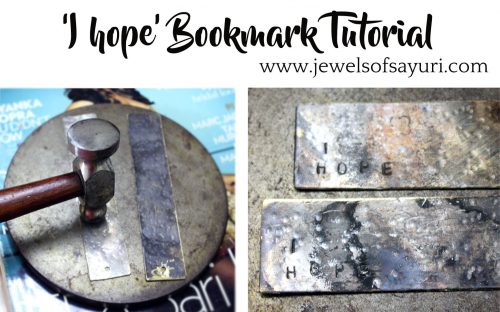
6. Hammer the metal to add texture. I used a ball peen (chasing hammer) to add round marks ( As I was recyling my sheet it already had assorted texture marks in it, so I worked around it).
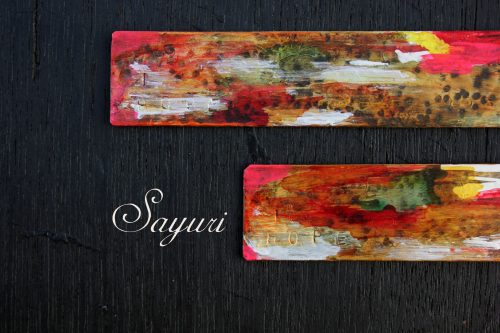
7. Select your stamps for the words that you want to stamp. I chose to stamp the words “I Hope”. Hope is one of my words for this year and it is a part of my personal tagline. For those you have not noticed before, I usually end every blog post of mine with the “I hope you found it interesting“ tagline. Laying out stamps in order with the letter facing me makes sure that I do not mess up the order.
8. Tape your piece to the block to avoid movement and and stamp one letter at a time, making sure to maintain the correct spacing. I did not follow my own advice as I was in a hurry so my letters are not straight (Face palm moment)
Cleaning & Coloring
9. Because I annealed my piece it was black. I cleaned it using a homemade pickle by dipping a fabric in the pickle and swiping over the piece. This is to make sure that I retained the oxdisation in the recessed areas. I scrubbed the back clean using pickle and a brass brush. Check out this old post on how to clean copper and brass for more pickle ideas.
Another option is to fully clean the metal, oxidise it in LOS and relief the piece with a relief block. I opted to go with the former plan to save time (I will be adding color on top). If you do not want to add color, you can also stop with this step by sealing the piece with Renaissance wax. Add any beads or fibre that you want to add to the bookmark to embellish it.

Adding color
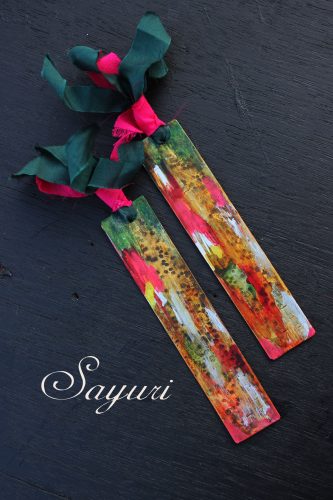
10. Using a sponge applicator or a soft cotton fabric dab the resin tints ruby red on the left corner followed by Yarrow throughout the surface. Ever since I got the resin tints in August last year I have been using them in all my projects and I absolutely Love them. They are pricey compared to patina inks so if you can just afford one, I recommend that you get Yarrow. It is a fantastic illuminating yellow. Though the tints are made for resin, they work extremely well on metal lending a subtle sheen that has to seen to be believed.
11. Add emerald ink, and metallic alcohol inks to create your own pattern. Since I wanted my bookmarks to reflect the colors of India, I went for bright, happy colors. I also added a little nail polish pink in the end. but you can replace it with the Rose quartz resin tint for an uniform translucent look.
12. Clean up any spills at the back and let it dry for atleast 15 minutes before sealing with Ren wax. In this bookmark I have used a combination of tints and different inks. I recommend using Ren wax as the sealant to avoid any bleeding that could occur due to spray or liquid sealants.
Make Tassels – for one bookmark
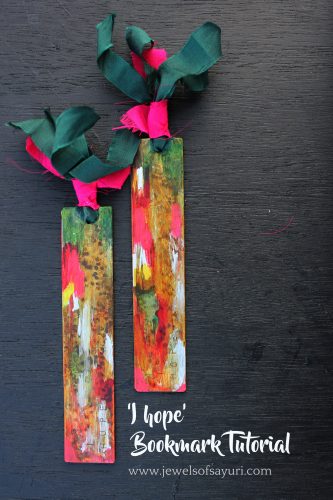
13. Cut 2 pieces of 5″ green ribbon (fabric) and one piece of pink ribbon (fabric) at 5/8″ width .
14. Thread the green ribbon through the bookmark holes and tie it up with the pink ribbon by knotting.
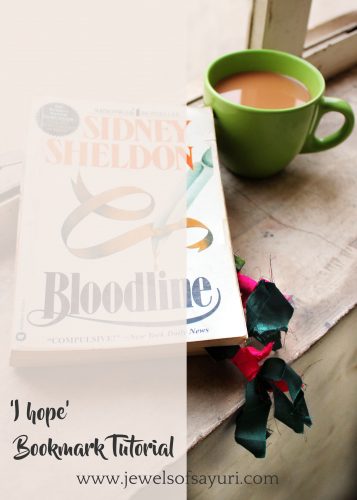
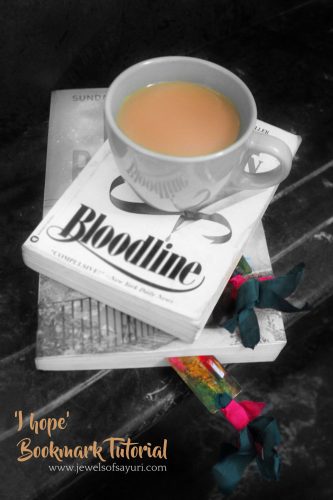
Enjoy some “me time” by reading a favourite book of yours and sipping tea and natural light filters in from a window sill. Dream away, for your favourite page is now marked by your handmade bookmark
Notes:
*#1 -As the gauge is higher I got the metal cut using guillotine shears in my college lab. If you do not have access to one saw the piece using a jewellers saw.
** #2 – Annealing Brass – there are many different theories and techniques for annealing brass. I simply heat until it turns black and let it air cool. I have tried a lot of methods and this works the best for me. If there is a better technique that you know of, please mention it in the comments.
***#3 – Close your eyes and run your finger tips or palm all around the edges. It should feel absolutely smooth against your skin. This is not an industry standard but just a personal test that I use. Do it only after sanding/filing your pieces 2-3 times minimum to avoid cuts/splinters on your fingers.
I have made a metal bookmark once before, however it was very flimsy as I used 26g copper sheet. This Metal Bookmark DIY tutorial is an attempt to correct my earlier mistakes. I hope that it inspires you to try it out. If you make a version of my bookmark, please share it with me. I would love to hear about your thoughts.
I hope you found it interesting
Cheers

Leave a Reply