
%2B.jpg&container=blogger&gadget=a&rewriteMime=image%2F*) I was cleaning out magazines the other day and thought ‘Wouldnt it be great if I could reduce junk and at the same time create a piece of jewelry without spending anything?’ and that thought led me to making this cute necklace with glossy magazine paper beads and a punch based rose. Do try it out!!
I was cleaning out magazines the other day and thought ‘Wouldnt it be great if I could reduce junk and at the same time create a piece of jewelry without spending anything?’ and that thought led me to making this cute necklace with glossy magazine paper beads and a punch based rose. Do try it out!!
Paper bead rose necklace DIY
Materials:
– 1 glossy magazine sheet or any paper
– toothpick/quilling needle
– Modpodge
– flower punch
– 6 gray pearls
– 3 white pearls+ 1 bead
– jump rings
– eyepins
– round nose pliers
– wire cutter
– chain
– clasp
Method:
Make the beads
1) Cut the paper into 4 isosceles triangles of 3cm width and one of 1.75cm width.
2) roll them with a toothpick into beads(the 3cm width ones should be rolled into bi cones and the normaler one into a cone). To roll into a cone keep the pointy end of the triangle on one end of the toothpick while rolling and in the center to get a bicone
3) put into an eyepin and loop. Repeat five times. (ignore the extra bead in the how to visual)
4) Seal the beads with a sealant. I used modpodge (2 coats)

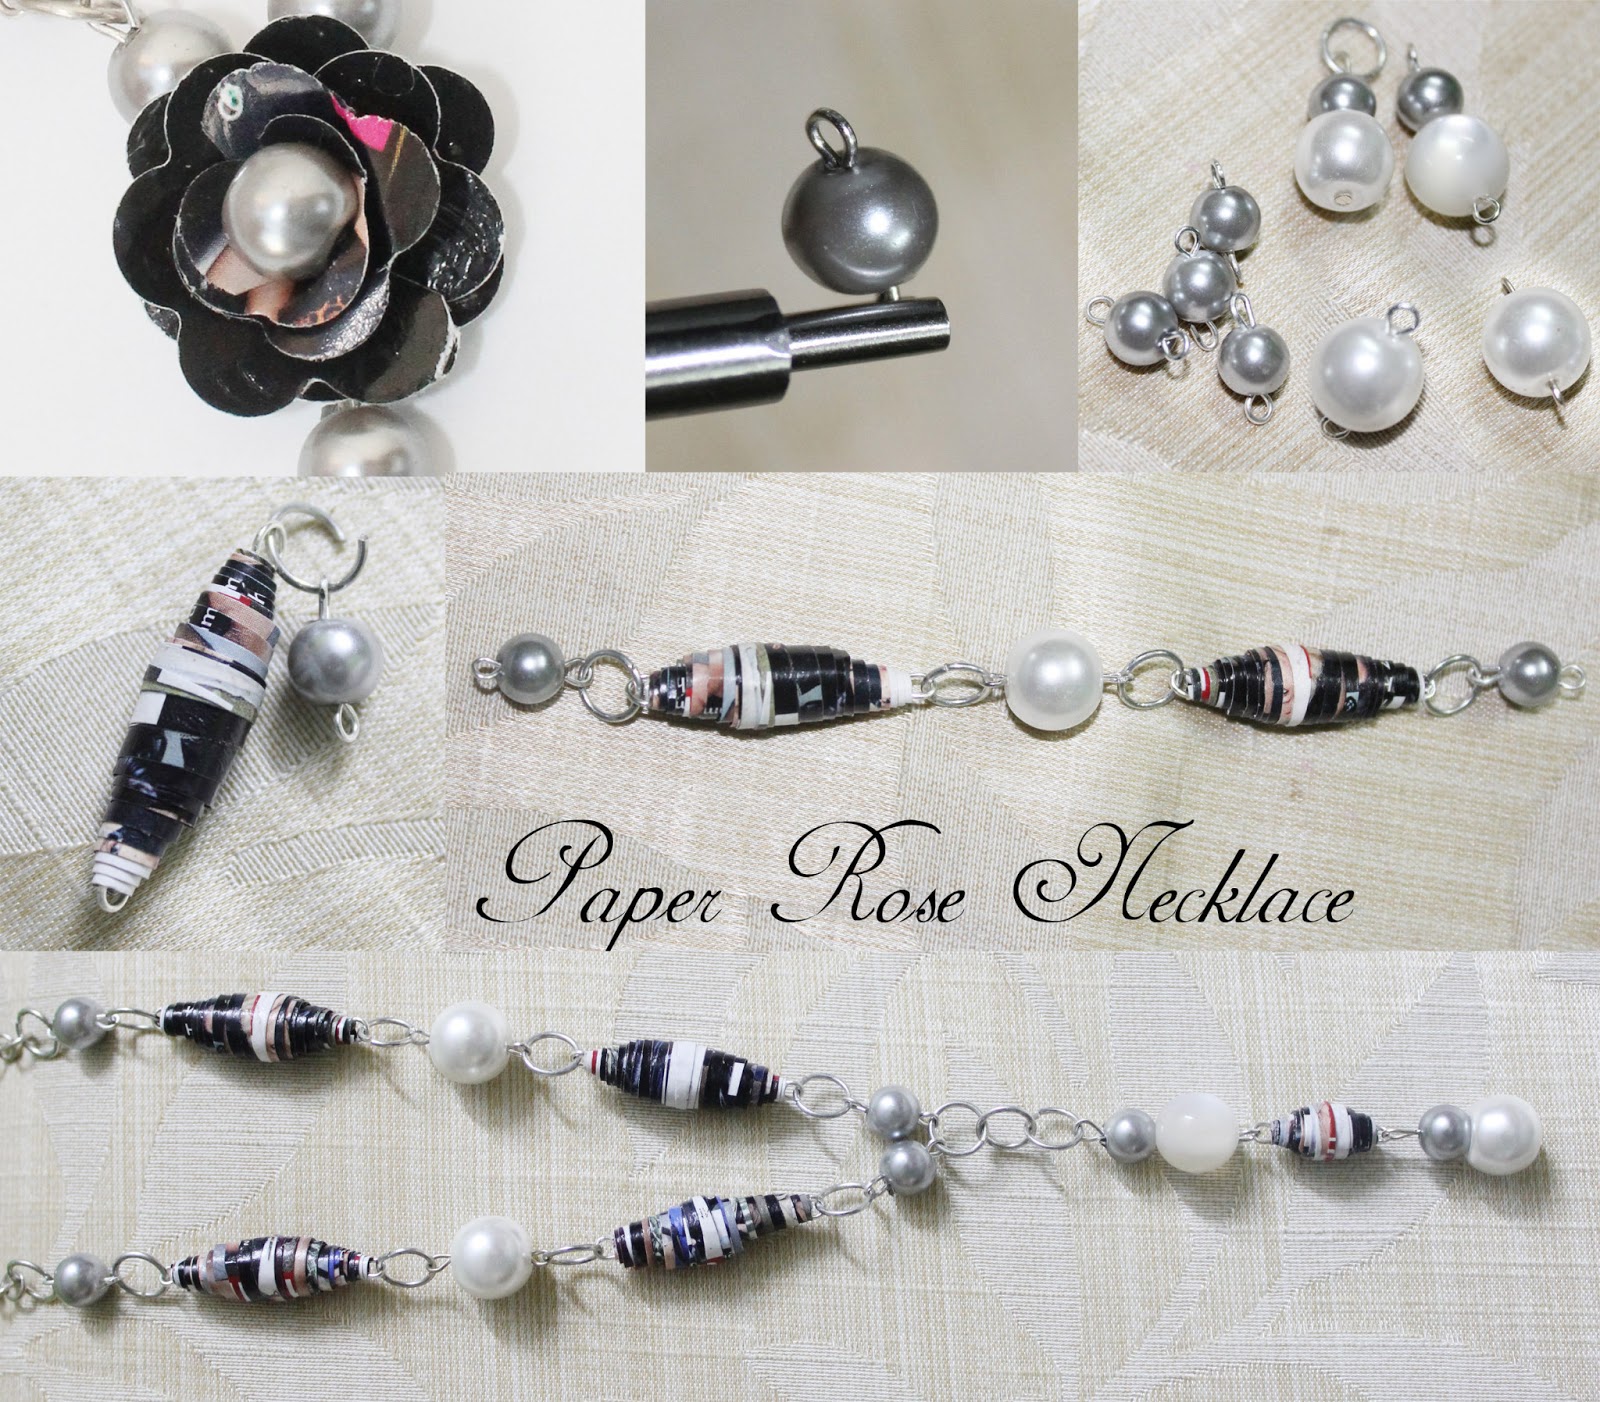
Make the Chain
1) using a round nose plier (or step pliers) and eyepin, make a simple loop on a gray pearl. Repeat for three more gray pearls, 2 big white pearls and one with a combination of gray and white pearl/bead
2) put a white pearl followed by a gray on a headpin and loop
Assembly
1) using jump rings connect the section in this order (abbv.) (JR- jump ring PB- paper bead GP- gray pearl WP- white pearl GWP – gray white pearl)
a) JR – GP – JR – PB – JR – WP – JR – PB – JR – GP (REPEAT FOR OTHER SIDE)
b) Join both in center with a JR – JR – JR – GWP – PB(CONE) – GWP
If you find the series directions confusing just look at the visual to connect them; it just sounds difficult but its really easy.
2) Glue the rose flower on the jump rings connecting the chain and mid section and remaining flower to the back so the the rings are concealed
3) Add chain at the back to get desired length and add a clasp if found necessary
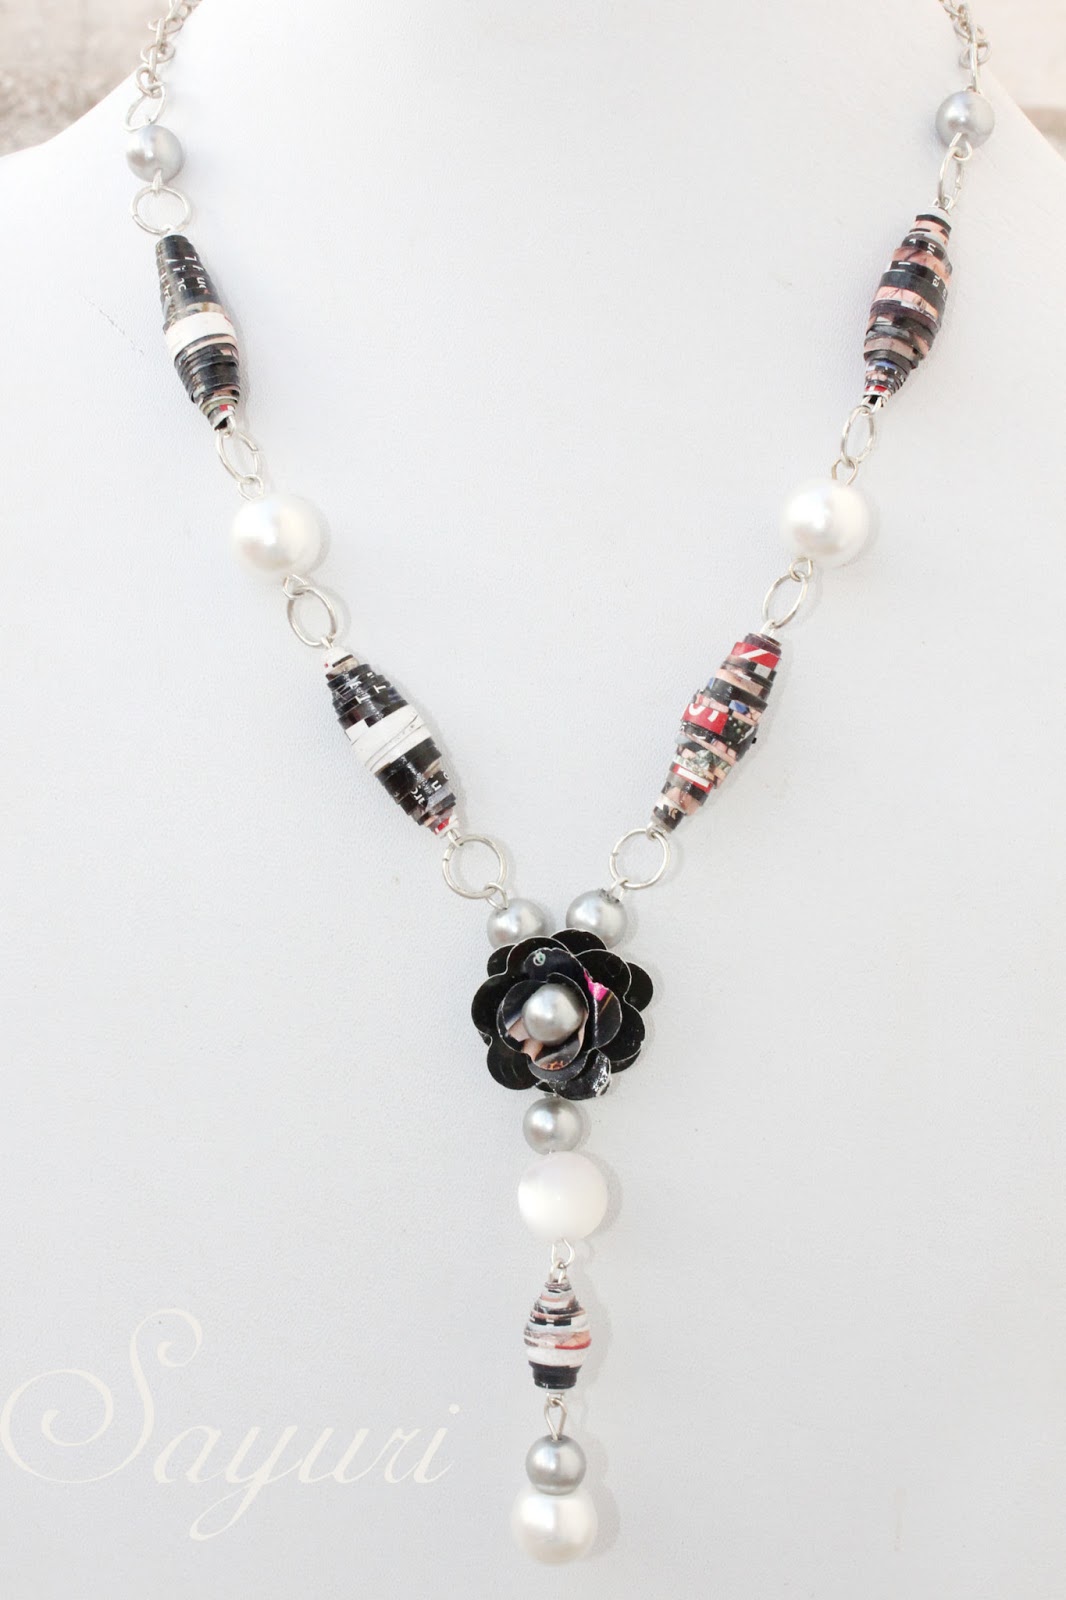
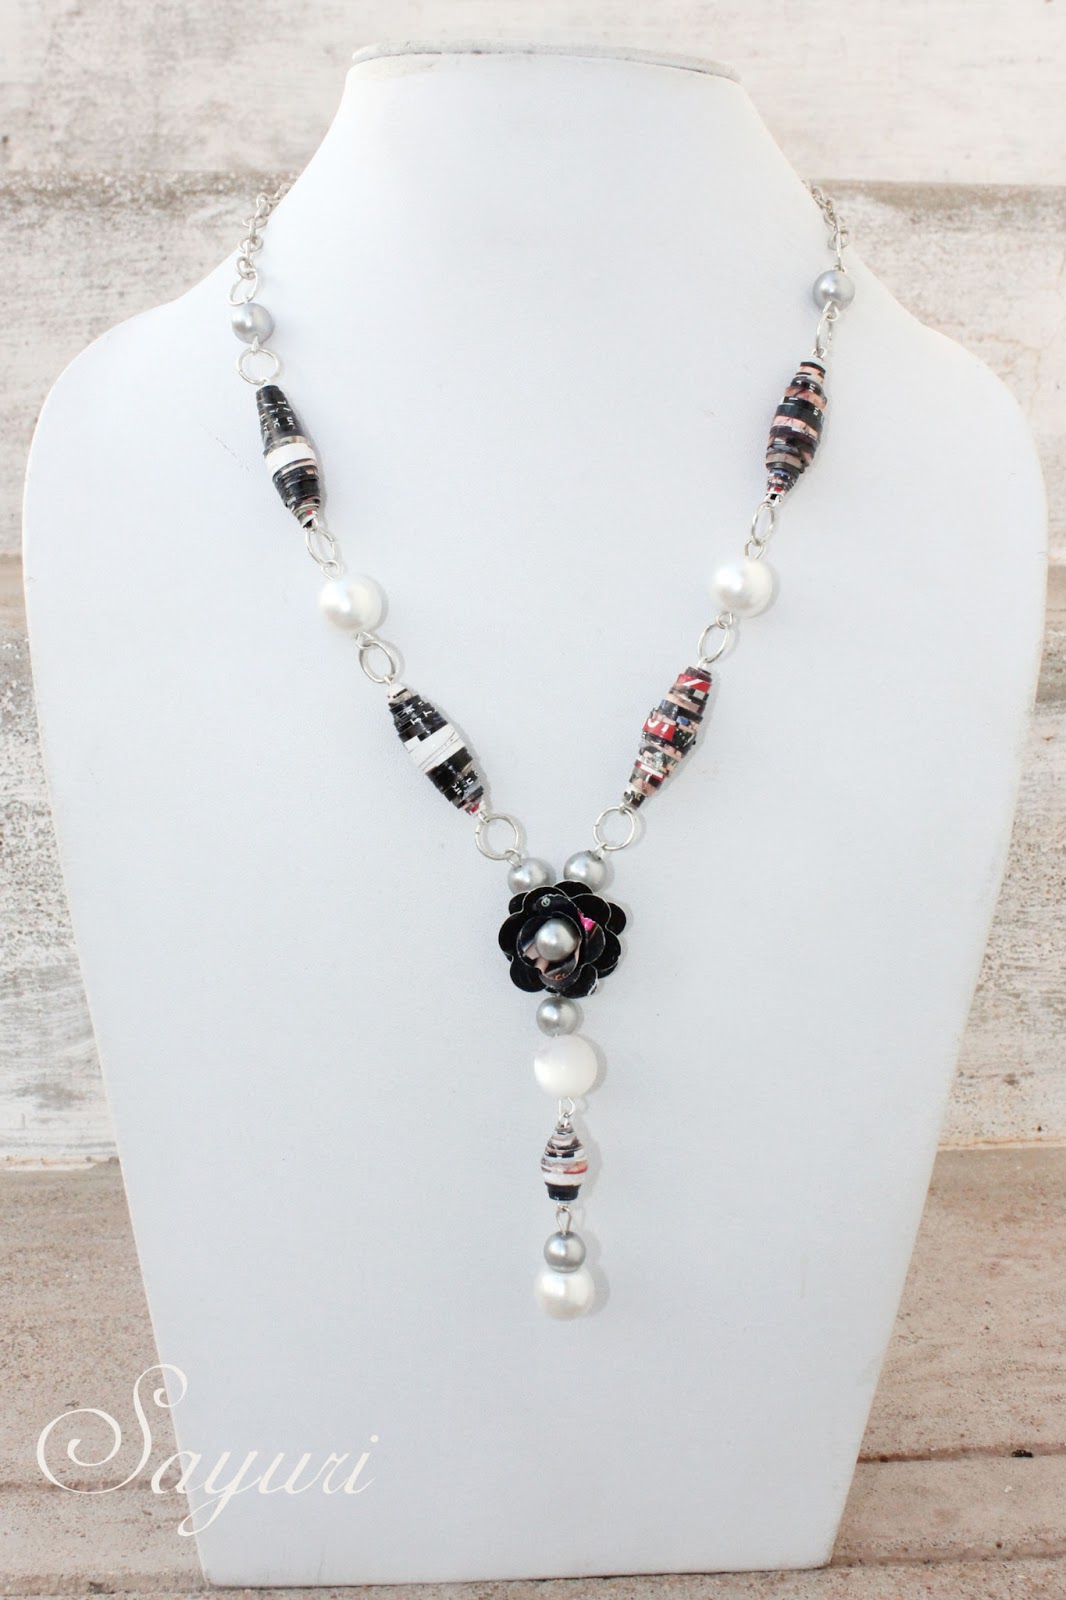
Thats it your paper bead rose necklace is done. If you desire you can use additional coats of sealant to protect your beads against water/sweat
I hope you find it interesting
Cheers
Leave a Reply