Finally I have bit the Halloween bug too. Halloween, unlike in the west is not a huge celebration in India, but of late due to global exposure, many throw Halloween parties and mask (masquerade) balls to celebrate it. However costumes are not so popular here. Partygoers may sport little devil horns or a bat wing and maybe a little spooky looking makeup but at the end of the day, its just people dressed up in black/ white Tshirts and jeans.
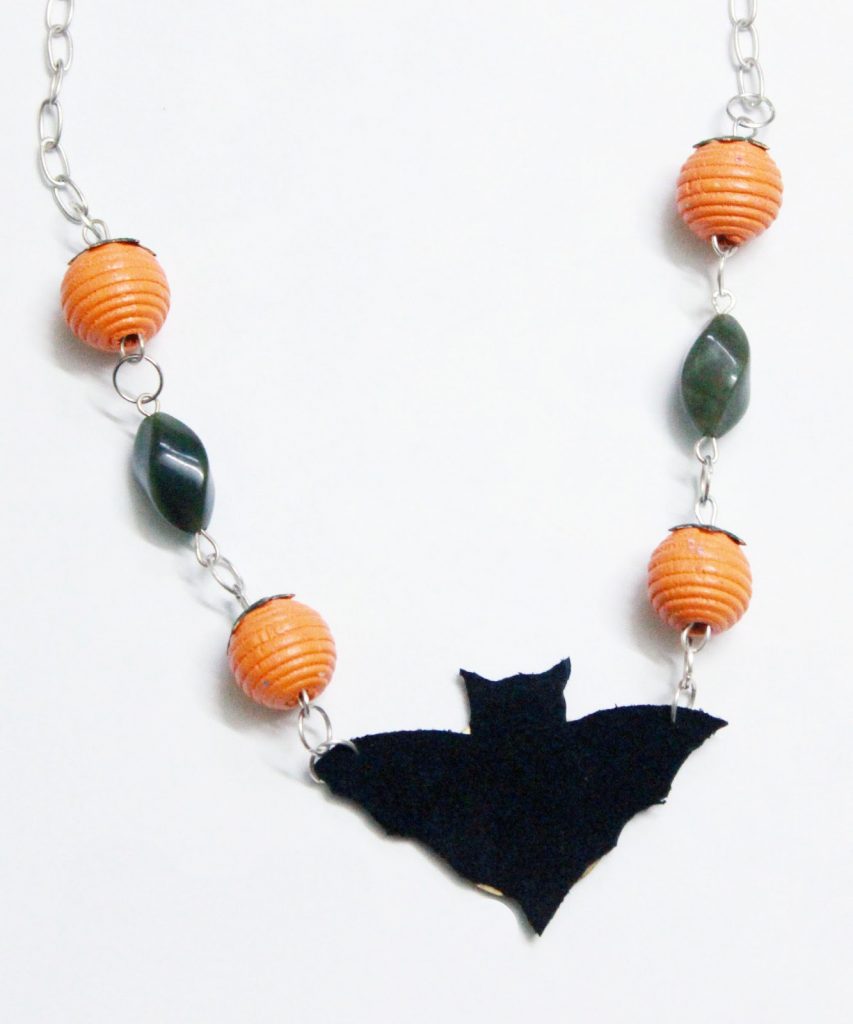
While it might be childish to sport a costume (or totally fun if you ask me!!), it would be nice to add a little Halloween touch to your basic jeans/tee or dress this year. With that in mind, here is Bat and pumpkins halloween necklace and a tutorial for you if you want to learn how to make it.
Bat and pumpkins halloween necklace tutorial

Materials
– A normal piece of leather (preferably coated or double sided)
– gold or silver flower spacers – 2
– 4 orange color wooden beads
– Acrylic/fabric green color
– silver eye pins
– jump rings
– coordinating green beads – 2
– brass disc – 1, glue(optional)
– silver chain
– closure – lobster clasp
– pliers round nose or step pliers
– wire cutters
– Awl or needle
Method

1) Make the bat : Start by drawing out a sketch of a bat for the template on cardboard/ thick paper or you could use a sticker if you have one. Transfer it to leather and cut. If you want the same effect as my necklace, fold a normal blank brass coin in half to get a center crease and glue (clear glue – fevi bond) to the leather. let dry. My bat is black on one side and a golden brown on the other due to the coating on the leather making the necklace double sided.

2) Create the Pumpkins: Color your flower spacers with acrylic or fabric color (green) to get the stem part of the pumpkin. Let it dry for atleast 15-20 minutes. (Top coat with sealant is optional – I did not do it). Wooden beads generally tend to have big holes so Make the existing loop on the eyepin bigger by re-looping it on round nose/ step pliers. I use Eurotool step pliers and they are great. Insert an orange bead (wooden..mine are from wholeport) followed by the painted bead cap and make a loop to finish it. Add jump rings to both loops. Create four such pumpkins.

3) Assembly – Poke 2 holes on the wings of the bat with an awl or needle and insert jump rings. Following the above process of looping, loop 2 green beads. Attach these to the already added jump rings of the pumpkins (such that all the pumpkins are facing the same direction) and attach the whole thing to the bat with jump rings. Make sure that you have closed all the jump rings well and that they have not opened out.

4)Finish: – Attach a length of chain to each of the final 2 pumpkins (on either side) using the loops of the chain or jump rings and finish with a jump ring and lobster clasp. Your double sided bat and pumpkins necklace is ready now!! wear it either on the black or the golden side

I hope you found this tutorial interesting. Do wear it for casually or for Halloween and enjoy it!!
Cheers


3 responses to “Bat and pumpkins halloween necklace tutorial”
I wanted to let you know I featured your Halloween Necklace in this weeks Whimsy Wednesday roundup – DIY Pumpkin Crafts & Recipes! http://bit.ly/1ei4ISl
Hope to see you again for tonights link party!
Susan
I love it! I think Kristina could totally rock this 🙂 Thanks for hooking up to Snickerdoodle Sunday!
Super cute! Just love Halloween jewelry. It's part of the charm of Halloween. Thanks so much for sharing with us at Merry Monday.