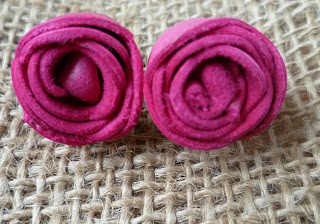
Hope everyone enjoyed the leather rose ring tutorial posted last week. In continuation, as promised, here is the Leather rose earrings tutorial.
The construction of the Leather rose earrings is very much similar to the ring, except that in the earring the raw edge will be visible in the front while the finger ring will have a smooth folded finish. The idea behind that is – the folded edge makes the ring more stable and single layer as opposed to double on an earring makes it lightweight.
Leather rose earrings tutorial
Materials:
# A strip of leather 1″ X 7″ – you could use rexin or faux leather instead. The length of the strip determines the width of your flower so you could make it a little longer or shorter.
# A pair of studs- earring base
# Scissors and glue (rubber based adhesive)
# A pair of studs- earring base
# Scissors and glue (rubber based adhesive)
Procedure:
1) Taper one edge of the strip like in the picture. Make a knot and pull tight

2) Now fold and twist the strip as you go around the knot, making sure that the folds are neat. Keep gluing as you twist and fold.
3) when you are about 1 to 1.5 inches from the edge, stop and make a hole
3) when you are about 1 to 1.5 inches from the edge, stop and make a hole

4) Insert the stud back from inside so that the base is covered. Glue in place.
5) Turn around to the from and glue it
5) Turn around to the from and glue it
6) Press firmly and let it dry completely. Repeat for the other earring

Your Leather rose earrings are done!! Let it rest for a day and then enjoy wearing it. Please note that both pieces will not exactly look the same so please don’t frustrate yourself trying to get the exact piece for both side. 😉
Hope you found this interesting
Cheers
Cheers


One response to “Leather rose earrings tutorial”
What a great idea. They are so pretty. Thanks for sharing at Throwback Thursday.